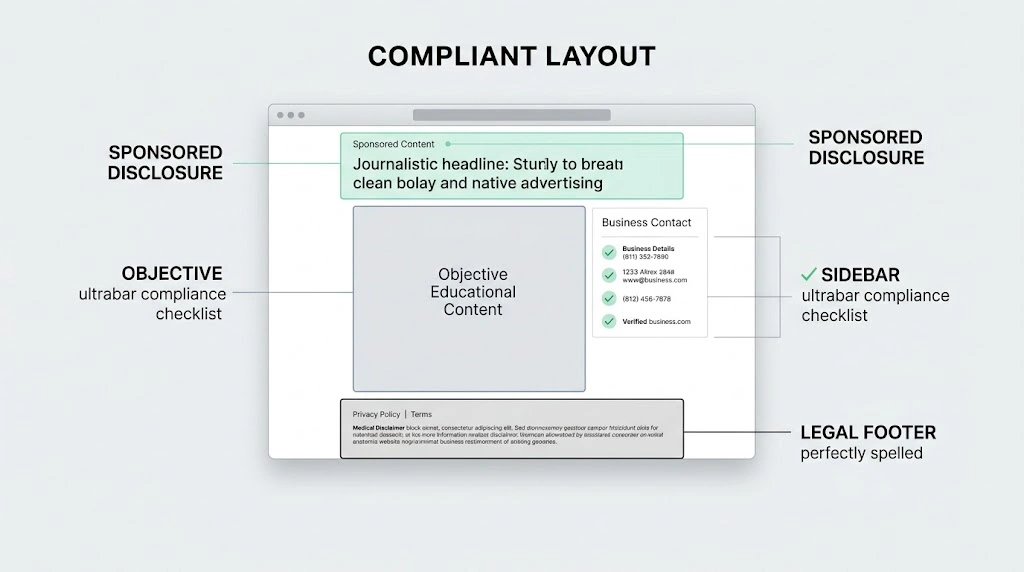
Outbrain Landing Page Guidelines: How to Fix Rejections
If your Outbrain campaign has been rejected, the fastest useful next step is not to redesign the entire page at random. Start by identifying the review issue, checking the page against the relevant policy, and making a documented correction before requesting another review.
This guide focuses on Outbrain landing page guidelines, common areas to audit, and a practical process for fixing a rejected advertorial. Platform requirements can change, and the reason in your account or review message should take priority over general checklists.
Read Outbrain's official content review guidance and the rejection message for your campaign. The checks below are a troubleshooting framework, not a guarantee of approval.
Outbrain Landing Page Guidelines: What to Check First
Review the complete user journey, not only the visible headline. Check the ad creative, destination URL, landing-page content, claims, disclosures, navigation, and the behavior of interactive elements. A page can look polished and still create problems if its claims are unsupported or the destination does not match what the ad promises.
1. Make the advertising relationship clear
Readers should not be misled about who is speaking or whether content is promotional. Review the page's byline, publisher identity, sponsorship wording, and transition to the offer. Use a clear disclosure appropriate to the page and applicable requirements; do not rely on a tiny footer note to correct an otherwise misleading presentation.
- Make the publisher, brand, or advertiser identity understandable.
- Use clear sponsorship or advertising language where appropriate.
- Do not imitate an independent publisher or imply editorial endorsement that does not exist.
- Ensure the disclosure remains readable on mobile screens.
The exact label, placement, and formatting should be checked against the current policy and the context of the page. Do not assume one label or position guarantees acceptance in every campaign.
2. Check the headline and the ad-to-page match
The headline should describe what the page actually delivers. Avoid unsupported superlatives, manufactured controversy, fake discoveries, and promises that the body cannot substantiate. The ad headline and landing-page headline do not have to be identical, but the destination should fulfill the expectation created by the ad.
| Risky approach | More defensible approach | Why it helps |
|---|---|---|
| “Doctors Are Hiding This Miracle” | “What the Evidence Says About [Specific Topic]” | Removes an unsupported conspiracy implication and sets a clearer expectation. |
| “This One Trick Guarantees Results” | “Factors to Consider Before Choosing [Product/Method]” | Avoids a universal promise unless strong evidence genuinely supports it. |
| An ad promising a guide that opens a sales-only page | A page that delivers the promised guide and clearly explains the offer | Improves continuity between the ad and destination. |
3. Audit claims, testimonials, and social proof
Every material claim should have a reasonable evidentiary basis. Verify testimonials, review counts, ratings, expert quotations, awards, media mentions, and before-and-after images before using them. Do not invent customers, credentials, endorsements, or publication coverage. If evidence is weak, remove the claim or rewrite it to match what can actually be demonstrated.
- Keep records supporting performance, health, financial, or comparative claims.
- Identify testimonials accurately and obtain any required permission.
- Do not imply a celebrity, expert, or publisher endorses an offer without authorization and evidence.
- Make qualifications and material limitations easy to understand rather than hiding them.
4. Review privacy, disclosures, and contact details
Check whether your page and campaign need a privacy notice, terms, contact details, advertising disclosures, or category-specific disclaimers under the applicable platform rules and laws. Requirements depend on the business, data collected, audience, location, and offer. Avoid treating a generic footer checklist as a universal legal determination.
- Confirm every policy link works and describes the actual site or advertiser.
- Explain relevant data collection and processing accurately.
- Include disclosures required for the product category and target market.
- Do not add a disclaimer as a substitute for correcting a misleading claim.
For legal questions, verify the rules that apply to your business and target geography. This article is operational guidance, not legal advice.
5. Test page functionality and mobile usability
Open the destination on a phone and desktop. Check whether the page loads, images display, buttons work, forms submit, and users can navigate without obstruction. Remove broken links, deceptive download buttons, unexpected redirects, and interface elements that interfere with reading or leaving the page. Measure performance with tools such as PageSpeed Insights, but do not treat one universal load-time or page-weight number as an official approval threshold unless current Outbrain documentation specifies it.
- Test the exact destination URL used by the campaign.
- Check mobile layout, text size, contrast, and tap targets.
- Verify forms, CTA buttons, redirects, and tracking scripts.
- Check for overlays or pop-ups that block content or make navigation difficult.
- Confirm the page does not change into a materially different destination after review.
Outbrain Landing Page Rejected? Use This Diagnostic Table
Start with the reason provided in the Outbrain interface or review message. If the reason is broad, use this table to organize your investigation; these are possible audit areas, not a claim that every item is a separately published rejection category.
| Issue to investigate | What to inspect | Practical correction |
|---|---|---|
| Misleading or sensational content | Headline, claims, images, and implied outcomes | Remove unsupported implications and align each claim with evidence. |
| Ad and destination mismatch | Ad promise, landing-page headline, offer, and final URL | Make the page deliver what the ad reasonably promises. |
| Unclear commercial relationship | Byline, advertiser identity, sponsorship wording, and CTA transition | Make the promotional nature and responsible party clear. |
| Unverifiable social proof | Testimonials, ratings, logos, expert claims, and images | Document the evidence or remove the unsupported element. |
| Technical or navigation issue | Mobile display, page errors, redirects, forms, and links | Fix the issue and test the live destination again. |
| Policy or disclosure concern | Current Outbrain guidance and rules for the product category | Apply the specific requirement relevant to the campaign and market. |
How to Fix and Resubmit a Rejected Outbrain Landing Page
- Save the rejection details. Record the message, campaign, destination URL, and any examples or policy references provided.
- Reproduce the reviewed experience. Open the same URL and check it on mobile and desktop, including redirects and interactive elements.
- Map each concern to a page element. Identify the exact headline, claim, disclosure, link, image, or behavior that may be involved.
- Make targeted changes. Fix the cause rather than making unrelated edits that make it harder to understand what changed.
- Re-test the destination. Check the page, links, forms, mobile layout, and consistency with the ad.
- Resubmit or request clarification through the available account process. If the reason remains unclear, ask Outbrain support which policy or element needs attention. Approval is determined by the platform's review; no external checklist can guarantee it.
Record the rejection reason, the change made, the test performed, and the resubmission date. This helps you avoid repeating the same investigation and gives support a clearer description of what you corrected.
Outbrain vs. Taboola: What Should Advertisers Compare?
Do not assume that approval on one native advertising platform guarantees approval on another. Review each platform's current policy independently and compare the actual requirements relevant to your campaign rather than relying on broad claims that one platform is always stricter.
- Compare the current content and landing-page policies.
- Check rules relevant to your vertical, geography, and offer.
- Review ad-to-page consistency and required disclosures on each platform.
- Keep separate notes for platform-specific feedback and changes.
For a separate troubleshooting workflow, see our guide to fixing a rejected Taboola landing page.
Pre-Submission Outbrain Landing Page Checklist
- ☐ The page delivers what the ad promises.
- ☐ Headlines and material claims are accurate and supportable.
- ☐ The advertiser or commercial relationship is not misleading.
- ☐ Testimonials, endorsements, logos, and statistics are genuine and documented.
- ☐ Applicable privacy, contact, advertising, and category disclosures are present.
- ☐ The destination URL, redirects, forms, and CTA buttons work.
- ☐ The page is readable and usable on mobile and desktop.
- ☐ No overlays or scripts obstruct the content or navigation.
- ☐ The live page matches the version intended for review.
- ☐ The current Outbrain guidance has been checked for the campaign and offer.
Need Help Building or Auditing an Advertorial?
A professionally built page can help with copy structure, design, mobile usability, and technical implementation. It cannot guarantee platform approval: the final decision depends on the actual offer, destination, campaign details, and current review rules.
If you need help with a custom page, request a custom advertorial build on Fiverr. If you prefer to start from a layout, you can also browse the advertorial template collection and adapt it to your offer and requirements.